The wind window is the area in the sky where it is possible to fly a kite. We cannot fly a kite outside of the wind window as here it is not possible to create power nor keep tension in the lines. If there's no tension in the lines, the kite will stall and fall from the sky, therefore, it is important to understand how the wind window works to maximise your fun on the water and prevent any accidents or incidents from occurring.
Here is a quick exercise anyone can do to help picture the wind window:
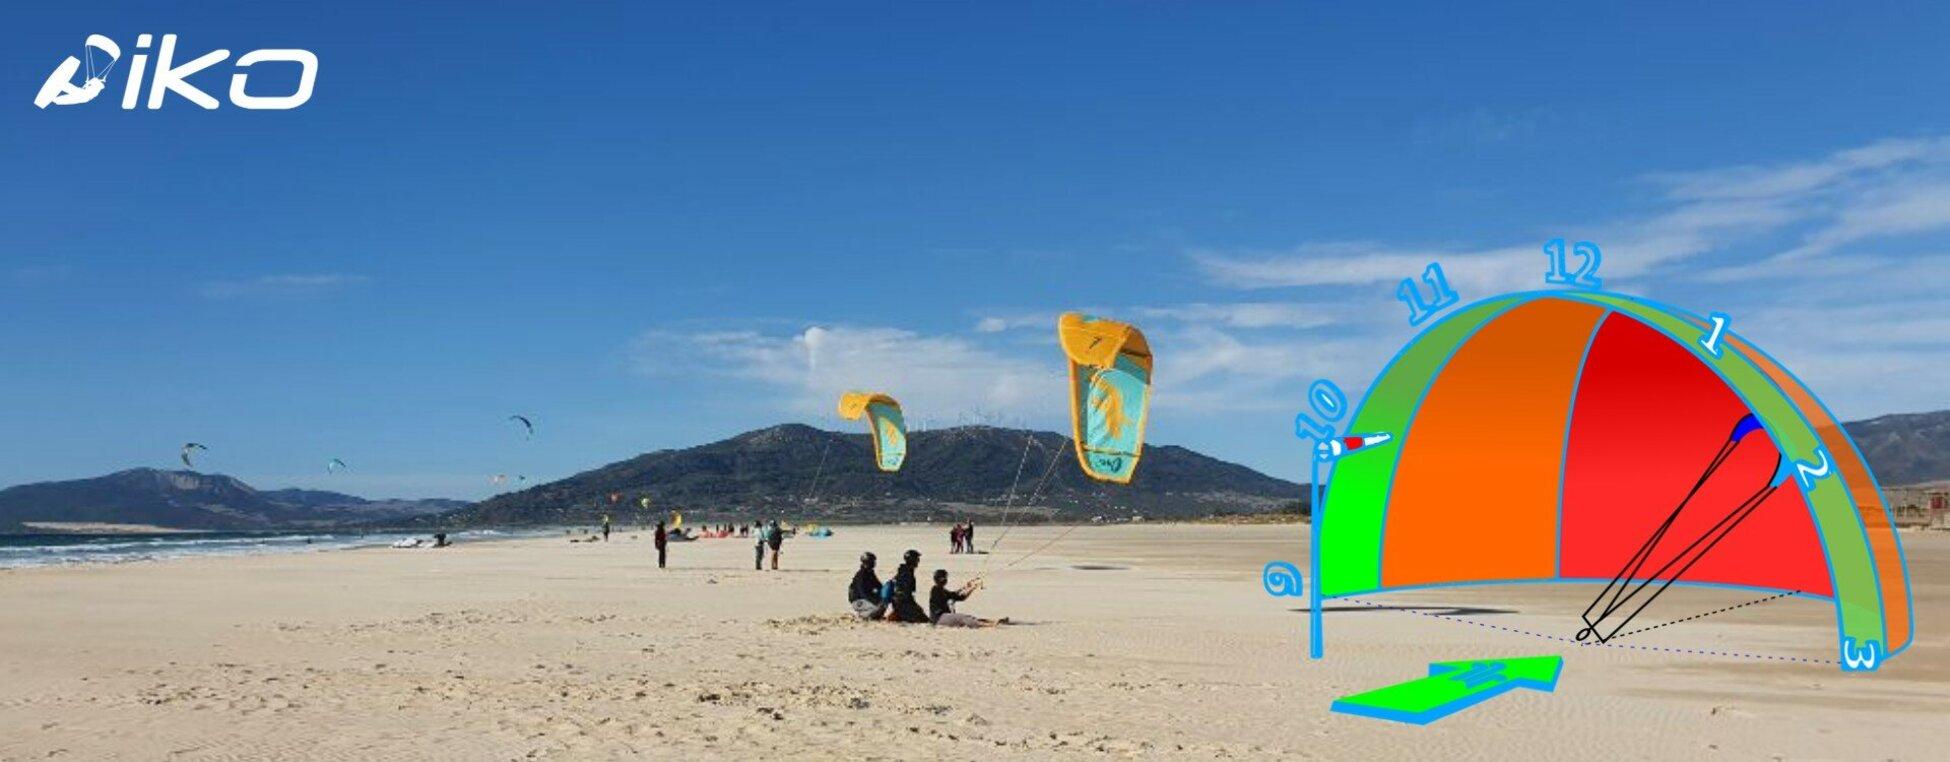
Now that you have a good understanding of where the wind window is, let me explain what it looks like.
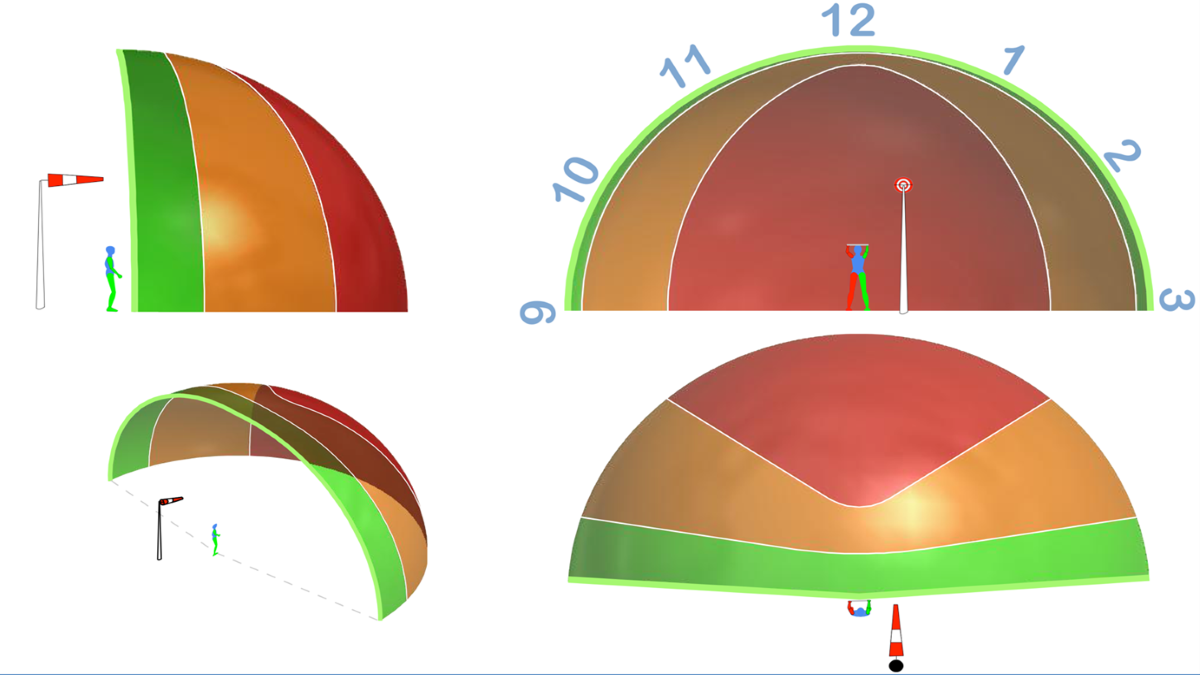
Quite simply... It looks like a big half dome. The flat section of the half dome is across the wind on either side of your position and travels upwards towards the sky. The curved section of the half dome is downwind of your position.
Check out the diagram below for a visual reference.
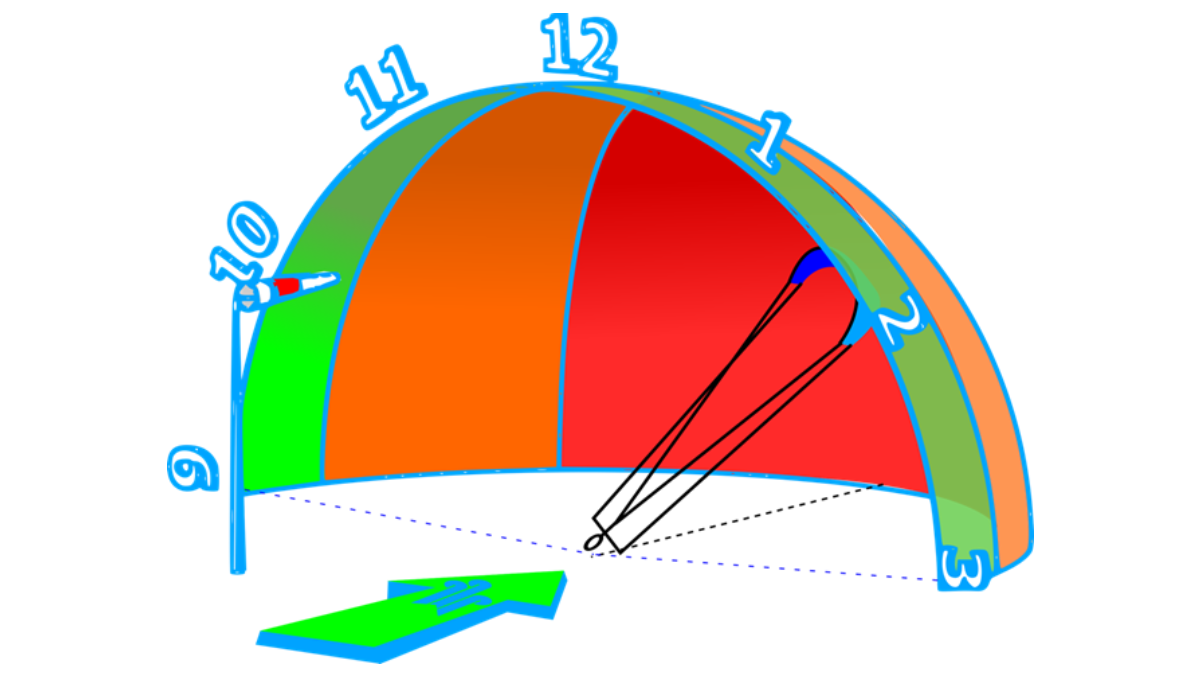
Any eagle-eyed readers may have noticed there are numbers on the wind window. We can compare the face of the wind window to the face of a clock.
These are the main three points to understand. 10 O'clock, 11 O'clock, 1 O'clock, 2 O'clock make up the other positions just like a clock face.
The size of the wind window is dictated by the length of the lines you use.
If you were to use 10M lines, the wind window would be 10m from your position to the perimeter. If you were to use 20m lines the wind window would be 20m from your position to the perimeter.
Therefore, adjusting the length of the lines we use will directly impact the size of the wind window making it either bigger or smaller.
The neutral zone can be seen on the diagram below as the green area around the perimeter of the wind window. Here there is little power created by the kite due to it being in an aerodynamic position. Air can easily flow on either side of the canopy thus creating little power. To keep a kite in the low power zone you must steer the kite gently. Slow steering will keep the kite towards the edge of the wind window.
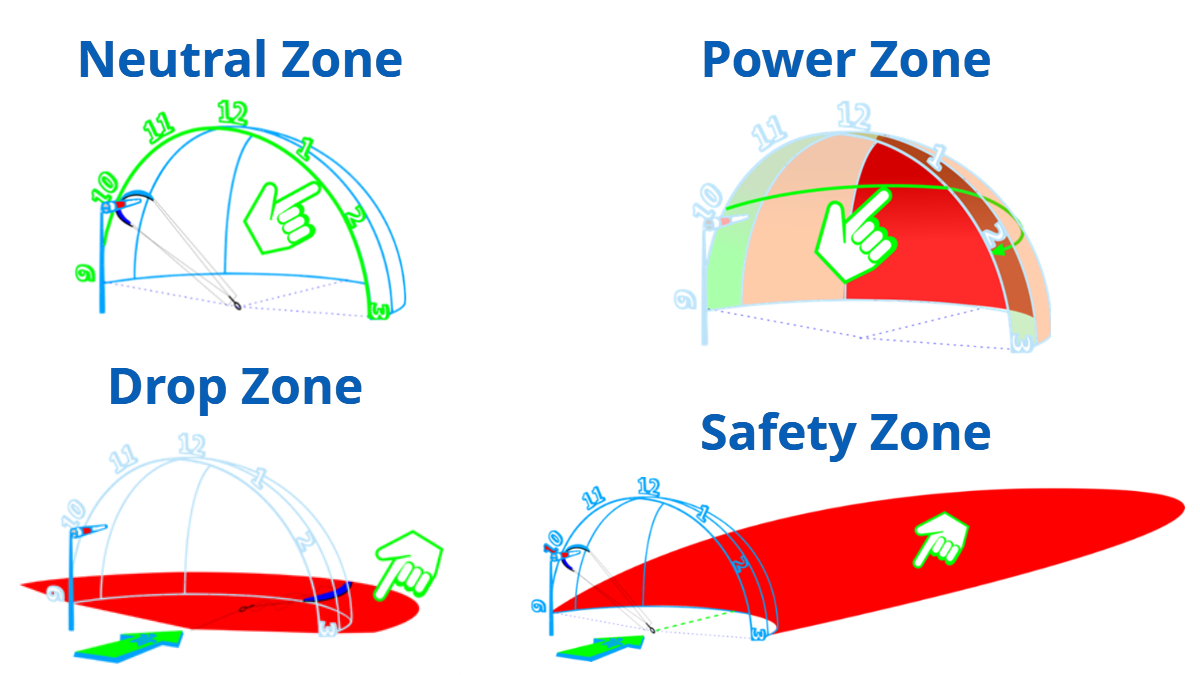
Once you have mastered steering the kite slowly across the edge of the wind window you can experiment with slowly adding a bit more power. You can do this by being more aggressive with the steering to bring the kite down in front of you. Now you will be working the kite into the high power zone. Be careful not to dive the kite too hard as the faster the kite steers across this high power zone, the more power you will receive.
We can increase the power a little more each time until the kite is now steering directly through the centre of the power zone downwind of you. A figure of eight is the simplest way to keep the kite constantly within the high power zone.
The main goal when launching a kite is to raise the kite from ground level towards the zenith of the wind window (12'Oclock) in a smooth and controlled manner. It is important to launch the kite from a position of low power to prevent being pulled off balance.
As explained earlier in this article, the edge of the wind window otherwise known as the low power zone stretches from 9 O'clock on one side, all the way up to 12 O'clock, and then over to 3 O'clock on the other side.
We can therefore launch a kite from either 9 O'clock ground level on one side or 3 O'clock, ground level on the other side. The side we choose can depend on the wind direction, local hazards and other beach users around us.
When landing a kite you'll start with the kite high and slowly lower it through the low power zone down towards either 9 O'clock or 3 O'clock. Again, take the local spot and hazards into consideration.
The drop zone is the area at ground/sea level located directly underneath the wind window. It is called the drop zone because it's the area the kite would land in should it crash/stall. Therefore it must be kept clear of any obstacle for the rider’s safety and the safety of others. The size of the drop zone will depend on the length of the lines, plus the span of the kite and the kite leash length.
The safety zone is a minimum distance we try to keep away from hazards to prevent injury or accidents from occurring. The general rule is to keep a safe distance of three times the length of your lines minimum away from any hazard. If you were to use 20m lines you should aim to keep at least 60m away from any hazards. The safety zone needs to be large enough to allow sufficient time to fix any issues with your equipment should you encounter any.
For more on the wind window and other key kite concepts, check out the new IKO Assistant Training Course, which you can now start online from the comfort of your home.
Author: Bradley Mackelden